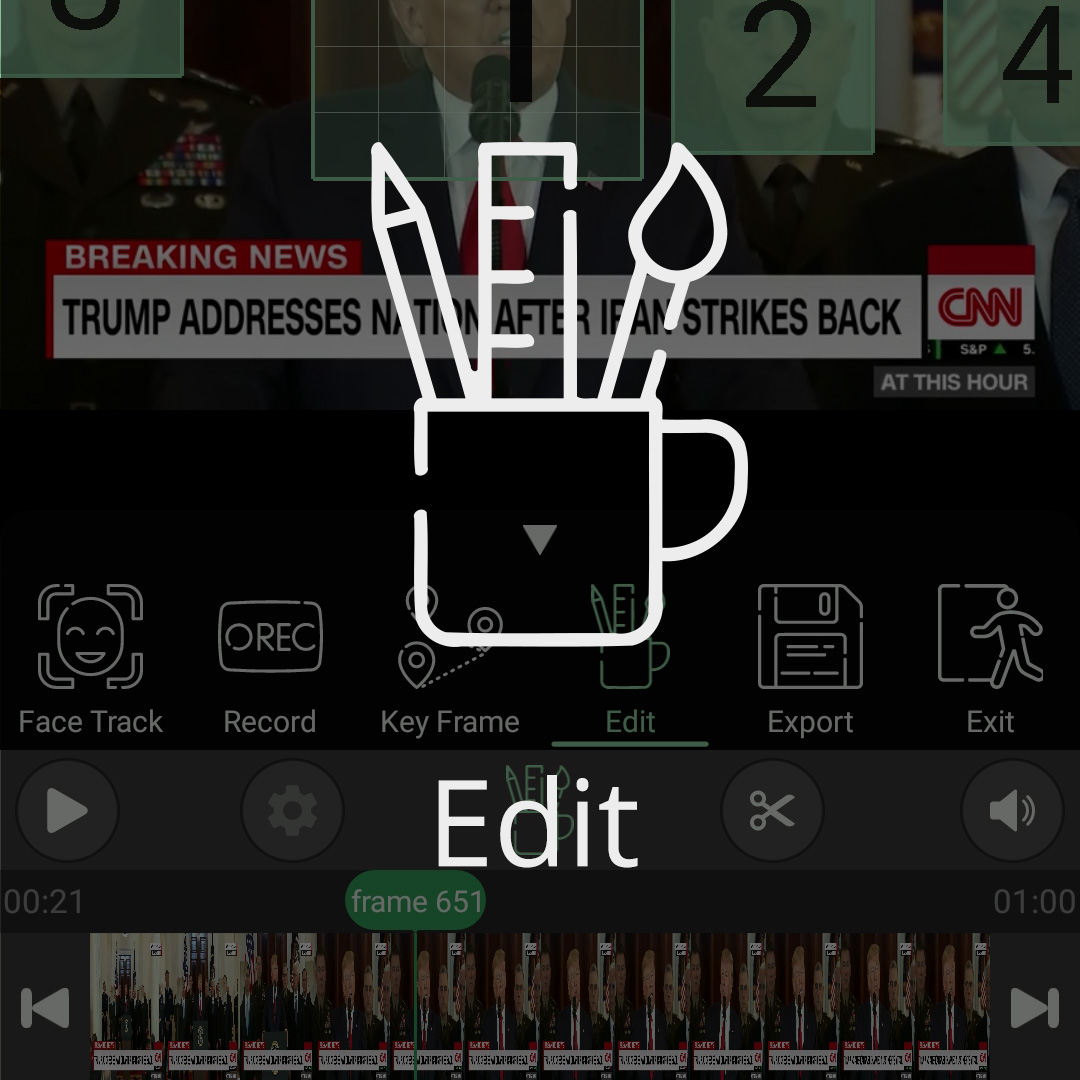
How To Work With Edit
In PutMask App
First, you need to set PutMask into the editing state, which is possible in one way:
1- First, click on the state icon to open the states menu, (1) and then click on the “Edit” button. (2)

How to edit the location and size of a filter in a specific frame?
Now, if you have not selected a filter, you need to select one.
After selecting the filter (3), you can change the location and size (4) of the filter only in the frame that is being displayed. (5) To change it in other frames, just move a frame by clicking the frame stepping buttons. (6) Since this is a tricky method, we have some other tools for you to make editing easier. At the end of the tutorial, we will explain these methods.

If you do something wrong, do not forget that you can always use the “Undo” (7) and “Redo“(8) buttons to correct your mistakes.

How to change the duration of filters?
With the help of the scissors button, you can increase or decrease the beginning and the end of each filter. To do this, by clicking on the scissors button, a menu will open for you (9), which by clicking on the “Set Finish Here” button, the end of the filter will be set to the current frame number (10), and also by clicking on the “Set Start Here” button, the start of the filter will be set to the current frame number. (11)
Of course, you do not have to enter the editing state to use this feature, and you can use the scissors button in any other state.

Different modes of filter :
From version 2 onwards, you can use different modes to obscure the face By clicking on the “Color” button
you can see all the modes (12):

Mosaic Effect: In this case, the color of each section is equal to its average color
Random Colors: In this case, the color of each section is equal to a random color
Black & White: In this case, the color of each section is equal to black or white
Gaussian Blur: In this case, the gaussian blur effect applied to the selected area
Median Blur: In this case, the median blur effect applied to the selected area
Custom Color: In this case, the color of a filter is a custom color that you select
If you use the item Random Color or Black & White, the quality of the background video will decrease. Less quality is Less information:

Without Filter

Mosaic effect

Black & White

Random Color
Attention: Blur effect decrease the speed of Rendering and Exporting
How to change the resolution of the filters?
Clicking the “Pixel Rate” or “Intensity” button will open a panel for you (13) where you can change the pixel rate or intensity of each filter (intensity is for the blur types pixel rate for the others). (14)
The higher the pixel rate, the higher the resolution of the filter.
The higher the intensity of the filter, the lower the resolution of the filter & the slower the rendering and exporting speed.


Pixel Rate = 2

Pixel Rate = 5
Pixel Rate = 20
Pixel Rate = 50
How To Preview Intensity And Pixel Rate Of The Filters?
In the latest version of PutMask we add a button that named “Render Button” (15)
By clicking on this button PutMask goes to render mode and you can see a preview from your edit. For now the maximum quality of rendering is 576p. rendering can be CPU intensive so we recommend to you if your device has a poor processor just use this button in pause mode.


How to delete filters?
Finally, you can delete the filter by clicking the “Delete” button. (16)

You have probably noticed by now that we have three types of filters in PutMask:


.Yellow filter (KeyFrame Type) A filter created by Keyframe methods
.Red Filter (Record Type) The filter that you created in record mode by moving your finger
.Green filter (Track Type) is a filter that you created using the tracking (object or face) feature.
If you go to the KeyFrame tutorial, you will find that for editing keyframe filters, In addition to the frame-by-frame editing mentioned at the beginning, you have more tools to edit.
That’s why you can convert the two Track and record filters to KeyFrame type by using the Convert button.
How To convert the “Record” and “Track” filters to the “KeyFrame” filter?
First, click on the “Convert” button (17)

You will see a panel. Here you can specify the number of keyframes per frame, for example: (18)
if you enter 10 here, one keyframe will be added every ten frames to the filter.
If you check the “Revise Data” option,(19) the app reviews all the filter information and this information will change based on the added keyframes. As a result, the filter moves more smoothly. When you enter all the necessary information, click “Convert.” (20) And now you can edit KeyFrame filter. See the KeyFrame tutorial for more details.

How to change the size and location of a filter across multiple frames?
In this tool, you can modify the filter in just one frame, and the changes will be applied to the filter in the remaining frames of the video that contains the filter To activate this option, click on the “Apply to all” (21) button after clicking on the filter you wish to edit. All changes to the filter will now be applied to the entire filter at all times it is present in a scene. As an example, if you halve the filter width in a certain frame and move its position 10 cm down and to the right, in all frames that contain the filter, its width is halved and it also moves 10 cm down and to the right from its original position. When you are done, just click the “EDITING FINISHED” button to disable it Now you can see the result of your work (22)


6 thoughts on “Edit Tutorial”
Perfect
Ich habe 109 Euro ausgeben eine Programm der kann Gesichter austauschen aber nicht so gut wie ihr Programm will andere Gesichter machen vielleicht sogar andere Tiere ihre Programm kann das will zum Beispiel eine Hunde Kopf und eine Katze bei anderen die sollen natürlich auch Beweglichkeit haben dann gebe ich ihnen die 109 euro sofort aber langweilig bei ihnen nur weg machen
Ich will kreative sein
Mfg
Aktepe hidayet
aderiato
thanks 🙂
How I can add my face in a mask?
Use PutEmoji App PutEmoji